Table of Contents
Learn the essential hand signals used in indoor skydiving with this comprehensive guide. Understand and communicate effectively with instructors and fellow flyers using universal signs for safety, communication, and maneuvering. Mastering these signals ensures a smooth and enjoyable experience in the thrilling world of indoor skydiving.
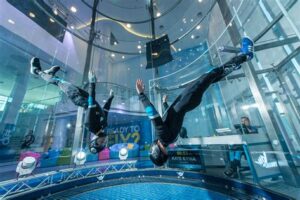
Are you ready to defy gravity and experience the thrill of skydiving without ever stepping foot out of an airplane? Indoor skydiving is an exhilarating activity that allows you to float on a cushion of air in a vertical wind tunnel. But how do you communicate with your instructor while soaring through the air at high speeds? That’s where indoor skydiving hand signals come in. These gestures serve as a universal language between instructors and flyers, ensuring clear instructions are given even in the midst of the wind tunnel’s roar. So, let’s take a closer look at the essential hand signals used in indoor skydiving and learn how to effectively communicate while defying the laws of gravity.
Introduction
Welcome to the exciting world of indoor skydiving! As a beginner, it’s important to familiarize yourself with the hand signals used during this exhilarating activity. Indoor skydiving hand signals are essential for effective communication between instructors and participants. In this article, we will guide you through the various hand signals used in indoor skydiving, ensuring a safe and enjoyable experience for all.
The Ready Signal
The first hand signal you need to know is the ready signal. This signal is given by the instructor to indicate that it’s time to prepare for the flight. The ready signal is a closed fist held to the chest, symbolizing that everyone should get ready for the upcoming activity.
The Exit Signal
Once you’re prepared, the instructor will give the exit signal, indicating that it’s time to enter the wind tunnel or jump out of the plane if you’re doing outdoor skydiving. The exit signal is indicated by the instructor extending their arm straight out in front of them, palm open and facing the ground.
Arch Position
When you’re inside the wind tunnel, it’s crucial to maintain the correct body position. The arch position is vital for stability and control. To signal the need for you to arch your back, the instructor will place both hands on their lower back, mimicking the desired posture.
Straighten Legs
In addition to maintaining the correct body position, it’s important to keep your legs straight during indoor skydiving. The signal for straightening your legs is demonstrated by the instructor extending one leg straight out in front of them with a slight bend at the knee.
Bend Legs
Conversely, if the instructor wants you to bend your legs, they will raise one knee towards their chest to indicate the desired position. This signal is crucial for executing certain maneuvers during indoor skydiving.
Relax Arms
During indoor skydiving, it’s essential to keep your arms relaxed and not flail them around. The instructor will demonstrate the relaxed arm position by holding both arms out to the side, slightly bent at the elbows. This signal reminds you to maintain a controlled arm position for stability and balance.
Stop Signal
If at any point during the activity you need to request a pause or stop, it’s important to know the stop signal. The stop signal is indicated by the instructor crossing their forearms in front of their chest, forming an ‘X’ shape. Upon seeing this signal, the instructor will halt the activity and attend to your needs.
Thumbs Up
The thumbs-up signal is universally recognized as a sign of approval or readiness. In indoor skydiving, the thumbs-up signal is used to acknowledge that you’re ready to proceed or indicate that you’re doing well. Simply extend your arm straight up with your thumb pointing upward.
Thumbs Down
On the other hand, the thumbs-down signal indicates a need to stop or address a concern. If you’re feeling uncomfortable or experiencing any issues, give the thumbs-down signal by extending your arm straight down with your thumb pointing downward. The instructor will understand and take appropriate action.
Emergency Signal
In the unlikely event of an emergency during indoor skydiving, it’s crucial to know the emergency signal. The emergency signal is given by the instructor waving both arms rapidly above their head. Upon seeing this signal, all participants should cease activity immediately and follow the instructor’s guidance to ensure everyone’s safety.
Conclusion
Understanding and utilizing indoor skydiving hand signals is essential for effective communication and a safe experience. By familiarizing yourself with these signals, you’ll be able to follow instructions, communicate concerns, and enjoy the exhilaration of indoor skydiving to its fullest. Remember, safety always comes first, and these hand signals play a vital role in ensuring an enjoyable adventure.
Indoor Skydiving Hand Signals – Instructions
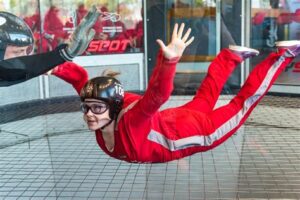
Indoor skydiving is an exhilarating experience that simulates the sensation of freefalling in a controlled environment. To ensure a smooth and safe flight, understanding and utilizing proper hand signals is essential. This guide will provide you with a comprehensive understanding of the various hand signals used during indoor skydiving.
1. Start Signal:
To initiate your flight, the instructor will signal you to start by holding one hand horizontally in front of them, palm facing down. This signal suggests that it is your turn to enter the wind tunnel and start your indoor skydiving experience.
2. Arch Signal:
During the flight, to maintain a stable body position, the instructor will demonstrate the arch signal by extending both hands straight out in front of their body, creating a slight curve with their arms. You should mimic this signal to ensure proper stability and control while in the wind tunnel.
3. Relax Signal:
If the instructor wants you to relax and loosen up, they will demonstrate the relax signal by placing one hand on their head and fully extending the other arm out to the side of their body, palm facing up. This signal suggests that you can relax and enjoy the experience without worrying too much about body position.
4. Increase Lift Signal:
In situations where more lift is required to gain altitude within the wind tunnel, the instructor will indicate the need for increased lift by gesturing with both hands, palms facing up, moving their hands upward in a pushing motion. This signal prompts you to increase the surface area of your body to generate more lift and gain altitude.
5. Decrease Lift Signal:
Conversely, when the instructor signals a decrease in lift, they will bring both hands towards their body, palms facing down, and move their hands downward in a pulling motion. This signal indicates that you should reduce your surface area by streamlining your body to decrease lift and descend within the wind tunnel.
6. Flip Signal:
If the instructor wants you to perform a flip or a specific maneuver, they will demonstrate the flip signal by making a full rotation motion with one arm, either clockwise or counterclockwise. This signal indicates that you should execute a flip or a rotation according to the instructor’s guidance.
7. Stop Signal:
To indicate the end of your flight or to bring your session to a halt temporarily, the instructor will make a T shape with both arms extended out to the sides. This signal tells you to stop all movement and return to a neutral body position until further instructions are given.
8. Emergency Signal:
In the event of an emergency, the instructor will use the emergency signal by crossing both arms at the wrists in an X shape in front of their chest. This signal signifies that you should immediately stop all actions and follow the emergency procedures discussed during the pre-flight briefing.
Remember to familiarize yourself with these hand signals and pay close attention to your instructor’s guidance throughout your indoor skydiving experience. Proper understanding and execution of these signals will ensure a safe and enjoyable flight.
Indoor skydiving hand signals are an essential communication tool that ensures a safe and enjoyable experience for participants. These signals allow instructors and flyers to convey important instructions and information without the need for verbal communication. Here are some points of view about the use of indoor skydiving hand signals, including instructions voice and tone:1. Clear and Concise Instructions: The use of hand signals provides clear and concise instructions to participants during their indoor skydiving session. Each signal has a specific meaning, such as arch your back or straighten your legs, which helps flyers understand what they need to do to maintain stability and control in the wind tunnel. By using hand signals, instructors can effectively communicate these instructions without any confusion.2. Universal Language: Hand signals in indoor skydiving are like a universal language that can be understood by participants from different countries and cultures. This is particularly important in facilities that attract international visitors, as it eliminates any language barriers and ensures that everyone can comprehend the instructions. The simplicity and universality of hand signals make them an effective means of communication in this context.3. Safety Enhancement: Indoor skydiving hand signals play a crucial role in ensuring the safety of participants. Instructors can use signals to alert flyers of potential dangers or to indicate when they need to adjust their body position. For example, a hand signal indicating to relax your arms might be used if a flyer’s body posture is causing instability. The use of hand signals allows immediate feedback and corrections, reducing the risk of accidents or injuries.4. Positive and Encouraging Tone: When instructors use hand signals to provide instructions, they can also incorporate a positive and encouraging tone through their body language. The gestures can be accompanied by a smile or a thumbs-up, creating a friendly and supportive atmosphere. This approach helps to boost participants’ confidence and motivates them to perform better during their indoor skydiving experience.5. Efficiency in Communication: Hand signals are a quick and efficient way of communicating instructions in the fast-paced environment of indoor skydiving. Verbal communication can be challenging due to the loud noise from the wind tunnel, making it difficult for participants to hear instructions clearly. By using hand signals, instructors can bypass these challenges and relay information effectively, ensuring that participants receive the guidance they need without any delays or misinterpretations.In conclusion, the use of indoor skydiving hand signals provides clear instructions, serves as a universal language, enhances safety, promotes a positive atmosphere, and ensures efficient communication. These signals, when accompanied by appropriate voice and tone, contribute to a memorable and enjoyable experience for all participants.
Thank you for visiting our blog and taking the time to read about Indoor Skydiving Hand Signals. We hope that our instructions have helped you gain a better understanding of the essential communication techniques used in this thrilling sport. Before we conclude, we would like to recap some of the key points discussed in the article.
First and foremost, hand signals play a crucial role in ensuring effective communication between skydivers and instructors during indoor skydiving sessions. These signals are necessary due to the loud noise generated by the wind tunnel, making verbal communication nearly impossible. By using a combination of simple yet effective hand gestures, skydivers can convey important information such as body position adjustments, safety instructions, or emergency signals.
Furthermore, it is important to note that these hand signals are universal within the indoor skydiving community. Whether you are flying at a local wind tunnel or participating in a competition abroad, you can rest assured knowing that the same set of hand signals will be used. This consistency not only allows for seamless communication but also ensures the safety of all participants, regardless of their language or cultural background.
In conclusion, mastering the art of indoor skydiving hand signals is a fundamental skill for anyone aspiring to become an experienced skydiver. By familiarizing yourself with these signals, you will not only enhance your safety and enjoyment during flight but also develop a deeper connection with the skydiving community as a whole. So next time you find yourself inside a wind tunnel, remember to keep an eye out for these hand gestures and use them to communicate effectively with your fellow skydivers and instructors.
Thank you once again for joining us on this journey through the world of indoor skydiving hand signals. We hope you found this article informative and engaging. If you have any further questions or would like to share your own experiences with hand signals in indoor skydiving, please feel free to leave a comment below. Safe flying!
.
People also ask about Indoor Skydiving Hand Signals:
-
What are the hand signals used in indoor skydiving?
Answer: The hand signals used in indoor skydiving are a crucial means of communication between instructors and participants. Some common hand signals include:
- Thumbs up: Indicates readiness to begin or continue with an activity.
- Thumbs down: Indicates the need to stop or abort an activity.
- Open hand palm down: Signals for the participant to slow down or decrease speed.
- Open hand palm up: Signals for the participant to speed up or increase speed.
- Tapping head: Indicates the need to pay attention or listen carefully.
- Pointing fingers: Used to indicate a specific direction or location.
-
Why are hand signals important in indoor skydiving?
Answer: Hand signals are important in indoor skydiving as they enable clear and concise communication without the need for verbal interaction. Since wind tunnels can be loud, it can be difficult to hear instructions. Hand signals provide a visual way to convey important messages, ensuring safety and effective guidance during the experience.
-
How do I learn the indoor skydiving hand signals?
Answer: Learning the indoor skydiving hand signals is typically part of the pre-flight briefing conducted by instructors before entering the wind tunnel. Instructors will demonstrate and explain each hand signal, ensuring participants understand their meanings and how to respond accordingly. It is important to pay attention during this briefing to familiarize yourself with the hand signals.
-
Can hand signals be used in outdoor skydiving as well?
Answer: Yes, hand signals are also used in outdoor skydiving for similar reasons. They facilitate communication between instructors and skydivers when verbal communication may be challenging due to the noise of the aircraft’s engines or wind resistance during freefall. However, it’s important to note that some hand signals may differ between indoor and outdoor skydiving, so it’s essential to learn and understand the specific signals used in each environment.
-
Are there any safety hand signals in indoor skydiving?
Answer: Yes, safety hand signals are an integral part of indoor skydiving. In addition to the general hand signals mentioned earlier, safety hand signals may include tapping on the shoulder or arm to indicate a gear or equipment issue, making a cut motion across the throat to signal an immediate stop, or forming an X with the arms to indicate an emergency situation. These signals help ensure the well-being of participants and allow instructors to address any concerns promptly.